How to Build a Vocal Booth
Morph Productions, my Toronto based studio ended up moving this summer and the new space required that I build a vocal booth. I'm pretty handy and have tackled many home improvement projects but nothing so involved as framing and drywalling a room within a room from scratch. In addition to that I also had to make space for a window and door (with extra wide) door jamb. Sometimes when life gives you challenges you just have to give yourself a little pep talk before you get started and then... get started. Here's a few pics and descriptions on how I made my vocal booth for the new studio. I'll also put a few things in of times where I went wrong to help you if you're building your own vocal booth. I'm by no means an expert and you'll want to reference other resources to build a booth of your own but hopefully you'll find a few useful nuggets of info that will help you on your build.
#1 Supplies:
I decided to make the booth double studded on the two outside walls (walls not against walls within the room). Originally I was going to make them all double studded walls but backed off from that when I realized doubled studded walls with double layers of drywall on both internal and external walls makes for a wall thickness of about 8". That adds up pretty quick in a small space. I bought about 56 2x4s to do the framing. For the drywall I decided to go with 2 layers of 5/8th drywall on the external walls and one layer of 5/8ths and a layer of 1/2" for the internal walls. The reasoning behind that is so the walls would (theoretically) vibrate at different frequencies which would require more energy for the sound to enter the booth. I bought about 27 sheets of 5/8 drywall and 8 sheets of 1/2 drywall. In total the booth ended up being about four and a half feet by five and a half feet inside with a height of about six foot five inches.


#2 Planning
Now that I had my supplies is was time to plan exactly how I was going to build and where. Obviously you'd want to have that all done in advance of buying supplies but there were a few logistical challenges for me to do that and I just made sure to buy a bit extra of everything. I placed some painters tape on the floor and spent about 2 hours rearranging everything to get the right size and location. I made sure to do approximate inner and outer wall thickness so I could see how much space was going to be taken up and how much would be left over.


#1 Supplies:
I decided to make the booth double studded on the two outside walls (walls not against walls within the room). Originally I was going to make them all double studded walls but backed off from that when I realized doubled studded walls with double layers of drywall on both internal and external walls makes for a wall thickness of about 8". That adds up pretty quick in a small space. I bought about 56 2x4s to do the framing. For the drywall I decided to go with 2 layers of 5/8th drywall on the external walls and one layer of 5/8ths and a layer of 1/2" for the internal walls. The reasoning behind that is so the walls would (theoretically) vibrate at different frequencies which would require more energy for the sound to enter the booth. I bought about 27 sheets of 5/8 drywall and 8 sheets of 1/2 drywall. In total the booth ended up being about four and a half feet by five and a half feet inside with a height of about six foot five inches.

I had to rent a truck to bring all the supplies to the studio. In retrospect I should of just had it delivered. 5/8ths drywall is extremely heavy and lifting 27 sheets of it into the truck and then out of it sucks.

With the help from a friend of mine we got all the supplies moved in.
#2 Planning
Now that I had my supplies is was time to plan exactly how I was going to build and where. Obviously you'd want to have that all done in advance of buying supplies but there were a few logistical challenges for me to do that and I just made sure to buy a bit extra of everything. I placed some painters tape on the floor and spent about 2 hours rearranging everything to get the right size and location. I made sure to do approximate inner and outer wall thickness so I could see how much space was going to be taken up and how much would be left over.

A few things to note about vocal booth shapes and sizes. A square is a big no no for sound purposes. In addition it's always good if you can have your walls a bit off in angles rather than completely straight and 90 degrees. Honestly I did make mine mostly straight for aesthetic reasons (the taped off layout isn't what I chose) but putting them at different angles is something worth considering before building.
#3. Framing
Next comes framing the vocal booth. Because two walls were double studded I had to make 6 framed walls in total. Due to low ceiling height I opted not to frame out a ceiling but instead capped the ceiling with 1/2" thick plywood with drywall screwed into it. This allowed me to save a few much needed inches of ceiling height.
First I cut the floor and ceiling plates:

After that it was cutting and screwing in the studs. Note the studs doubled up on the ends for extra strength.

A few things to note about framing. Unfortunately, even though I spent quite a bit of time researching this I didn't find out till later that the soundproofing compound I used Green Glue company recommends 24" on centre studs. I ended up doing 16" on centre. Apparently the more freely the materials can move the better the Green Glue works. Something to consider when building and this will also save you some 2x4s as well.
A tip for getting the spacing of your studs quicker is to measure out and pre-cut a piece of wood as a spacer while screwing in each new stud instead of having to measure each time (this was my friend Mike Langford's idea). To get 16 on centre we had a 14 1/4" spacer. Using this method my insulation fit in perfectly after I was done framing.
After the framed out walls were completed I screwed the two pieces that would be the walls that would ultimately be up against the walls in my room. I then added the dry wall to the external sections and when I was done I had to move it into place where I wanted it. Not a completely easy task but I did it.

Next the other walls are screwed into place:

I also began cutting out the spot for the window box I was installing.
I connected the double studded walls to their exterior counterparts with some metal covered in Green Glue Company Joist Tape so there would be some mechanical separation from the interior and exterior walls. There's better more expensive ways to do this but I didn't have the time to pursue getting them. In the end these worked out fine.


#5 Insulation
Insulating and drywalling are done at the same time because you have to drywall the outer walls before you put the insulation in. I used Roxul Safe and Sound insulation. On the double studded walls I was able to use two layers of it. Roxul Safe and Sound is used primarily to soundproof interior walls and has almost no R value for insulation. I have mixed feelings about using it because I really wonder how much of a difference it makes (years ago an old place of mine had a basement redone with it as it's only soundproofing measure and the results were disappointing) but nonetheless you gotta use everything you have to soundproof in such a small space.


#6 Drywalling
I mentioned drywalling a bit in the framing part because I had to drywall the walls that were against the room's walls so I could push them in and finish framing. I'll go more in-depth into the drywalling here. As I stated earlier I used two layers of 5/8th drywall on the exterior walls and a layer of 5/8th and 1/2" drywall in the interior. After the first layer of drywall was put up I used Green Glue Company Sealant to seal all the seams. Then when I put the second layer of drywall up I put 2 tubes of green glue per board on it before screwing it in place. I used green glue at my last studio too and I can't say enough good things about it. It's pricey but it works.
After the drywall is up you have to use wall compound to fill in the holes and tape up the seams as you would in any regular renovation project.

Applying sealant on the first layer's joints.

Applying green glue on the second layer before screwing it in.

All drywalled, taped and sanded.
It's a good idea to put up your second layer of drywall so the seams don't match with the first. In my case I put the board up horizontally, having one whole piece and one cut piece. The first time I would have the whole piece on the bottom and for the second layer I had it on the top so the seams weren't in the same spot thus creating a weak spot in the soundproofing.
For the ceiling I had the 1/2" plywood sit on top of the frame and then I screwed two layers of 5/8th drywall with lots of green glue to spare. I put the ceiling drywall up first so the wall drywall would further support it.
#7 Cabling
Obviously getting cables in and out can also create a weakness in your soundproofing so you have to be careful how you do it. I chose to use conduit that's usually used for electrical wires outside. I cut the conduit inside the wall to mechanically separate the inside and outside conduit as well. They didn't quite line up after that so it made it a bit of a pain to get cables through but I was ultimately able to get the cables I needed in. To do this this required 2 conduit boxes (one for the inside and the outside) to get the sharp 90 degree turns, one long piece of conduit about 6' long and a curved piece. Having the cables come in through the top and then exit through the bottom allowed for better soundproofing because the interior and exterior walls were penetrated at different spots thus not allowing sound to go directly through them.

Conduit on the external wall. The box was later filled with insulation.

Conduit coming from outside to in. I coated it with sealant. When making your holes make sure that any conduit boxes you use have clearance (note my other hole I had to fill).

Conduit dropping down to the floor.

Filling in with insulation. I also made some internal ventilation ducts in the booth for possible future ventilation.

With drywall up all that remains is the hole in the corner well insulated from the outside where the wires drop.
#8 Window and Doors
I wasn't sure if I wanted a window in the booth. I personally don't like looking at the people I'm recording as they're recording and I'm under the impression they don't like looking at me. I've always liked them to have their own space to do as they please while they're performing. That being said the booth being relatively small I was worried about people feeling claustrophobic and it is nice to be able to see the person you're communicating with between takes. I was fortunate enough to have the window box (made by the fine people at Peloton Contracting) from the other studio so I just measured it out and framed it accordingly. I can't really take credit for this thing as it wasn't made by me but here's a few pointers if you make your own.
The frame was routed out to allow the glass to fit into it better. Use some Green Glue sealant in the routed lines to get an airtight seal. My window box had 3 layers of glass, one of which was of different thickness. Again, as with the drywall, the idea behind this is that the glass with different thickness will have a different resonant frequency which means sound needs more energy to penetrate the glass. I'm not very knowledgable about this but it's actually better to have bigger spaces between the glass than more layers of glass. Also you'll note that one piece of glass is at an angle. That's so the sound bouncing off the glass in the booth fires up into the ceiling sound treatment rather than directly at the vocalist and into the mic.


For a door I had a real conundrum. Doors made specifically for soundproofing purposes cost a fortune and this vocal booth was already costing me quite a bit more than I expected. Another concern was that the window and the door were going to be the weakest link in the soundproofing chain so I couldn't afford to make a wrong move or all my other work would be for naught. What I decided on was lifting a solid wood door that was left out by a neighbour and laminating it with half inch plywood with green glue. The one unfortunate part of this was that the door ended up being thicker than a standard door and I had to spend 120 dollars on a commercial doorknob so I'd be able to open it. Here's a few pics from the door restoring and laminating I did:

Here's the door as I grabbed it more or less. I cleaned it with TSP and then removed the door knob.

After removing the door knob which is an older style with bigger gaps in the door I put shims in to fill the gap and then used wood filler to smooth it out.


Sanding and wood filler to take a few years off the ole girl.

Next I cut a piece of 1/2" plywood to the exact measurements of the door and screwed it to the back of it using Green Glue on it as well.
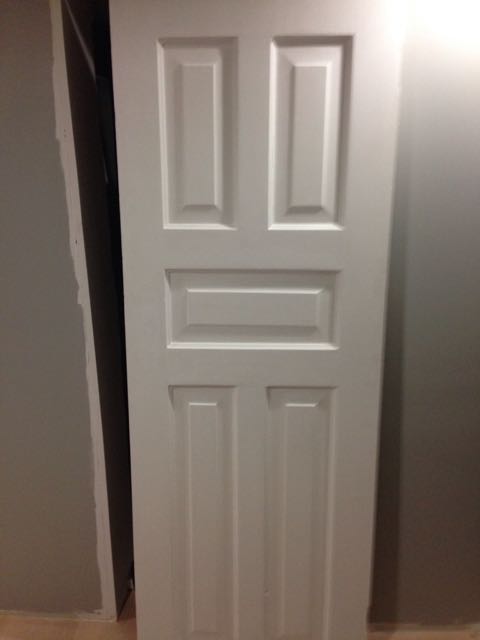
Here's the finished door minus doorknob.

Door installed minus trim

Here's a good shot of the back of the door with the laminated piece of plywood at the back.
In all honesty the door is working out good but it is unquestionably the weak spot in the soundproofing. I may revisit it again and laminate a piece of MDF on the back of it as well as the original plywood I had placed. That and more green glue should give me the results I'm looking for.
#9 Lighting
I wasn't sure what to do with lighting the vocal booth and then after some research on Amazon I found these fun LED light strips. The can change colours, flash (not essential but fun to show people) and it comes with a remote all for about 35 bucks! Importantly they also don't give off a lot of heat.


In this picture I also have the monitor installed that is connected to my computer. Good for ADR or when I'm recording myself and need to control my DAW from inside the booth.
#11 Sound Treatment
Last up was the sound treatment. I had a lot of Primacoustic panels from my old studio including a bass trap so I ended up using that in the booth. Soundproofing was obviously a big concern for me but also important was the actual sound within the booth. I'm happy to report that it honestly sounds great. I put sound treatment in the walls and the ceiling. Here's a few pics:

When I get some downtime I'll have to put some work into not having it so cluttered.
In closing making this booth cost me a lot more time and money than I originally had planned but I'm super happy with the results. It sounds and looks great and my clients have been super happy using it. At some point I may revisit the door situation and I'll also look into adding ventilation so it's more comfortable but for the time being I'm able to work with it and everyone is really happy with it. It's isolating the sound coming in and out of it and the sound of things I'm recording sound really good. Not bad for a first try. Hope you found this blog posting useful.
Here's a link to a good deal on Green Glue:
Check out below for my website and social media. If you have any questions feel free to email me. Good luck with your vocal booth build!
If you need help with your productions, mixes, or voice-over projects, feel free to reach out!
Ashton Price
www.MorphProductions.com
Instagram: @Morphpro
 |


Comments
Post a Comment