Monday, February 20, 2012

Monitoring Effects in Logic Pro While Recording (Reverb/Delay etc)

Generally speaking I prefer people to record their vocals with no effects so they can hear what their voice is actually doing and react accordingly.  Sometimes I work with people though who just can't "get into it" without some reverb and or delay in their headphones.

I have an Apogee Ensemble that runs with Logic and a long time ago I set it up so people were monitoring themselves directly from the Apogee Ensemble's mixer Maestro.  The advantage of this is that because they're monitoring off a hardware device as opposed to software there is virtually no latency.  With this set up I mute the channel I'm recording on in Logic or the performer would hear the latency free signal from the hardware AND the delayed signal from Logic's latency.  This sounds like a slap back echo and is very distracting!

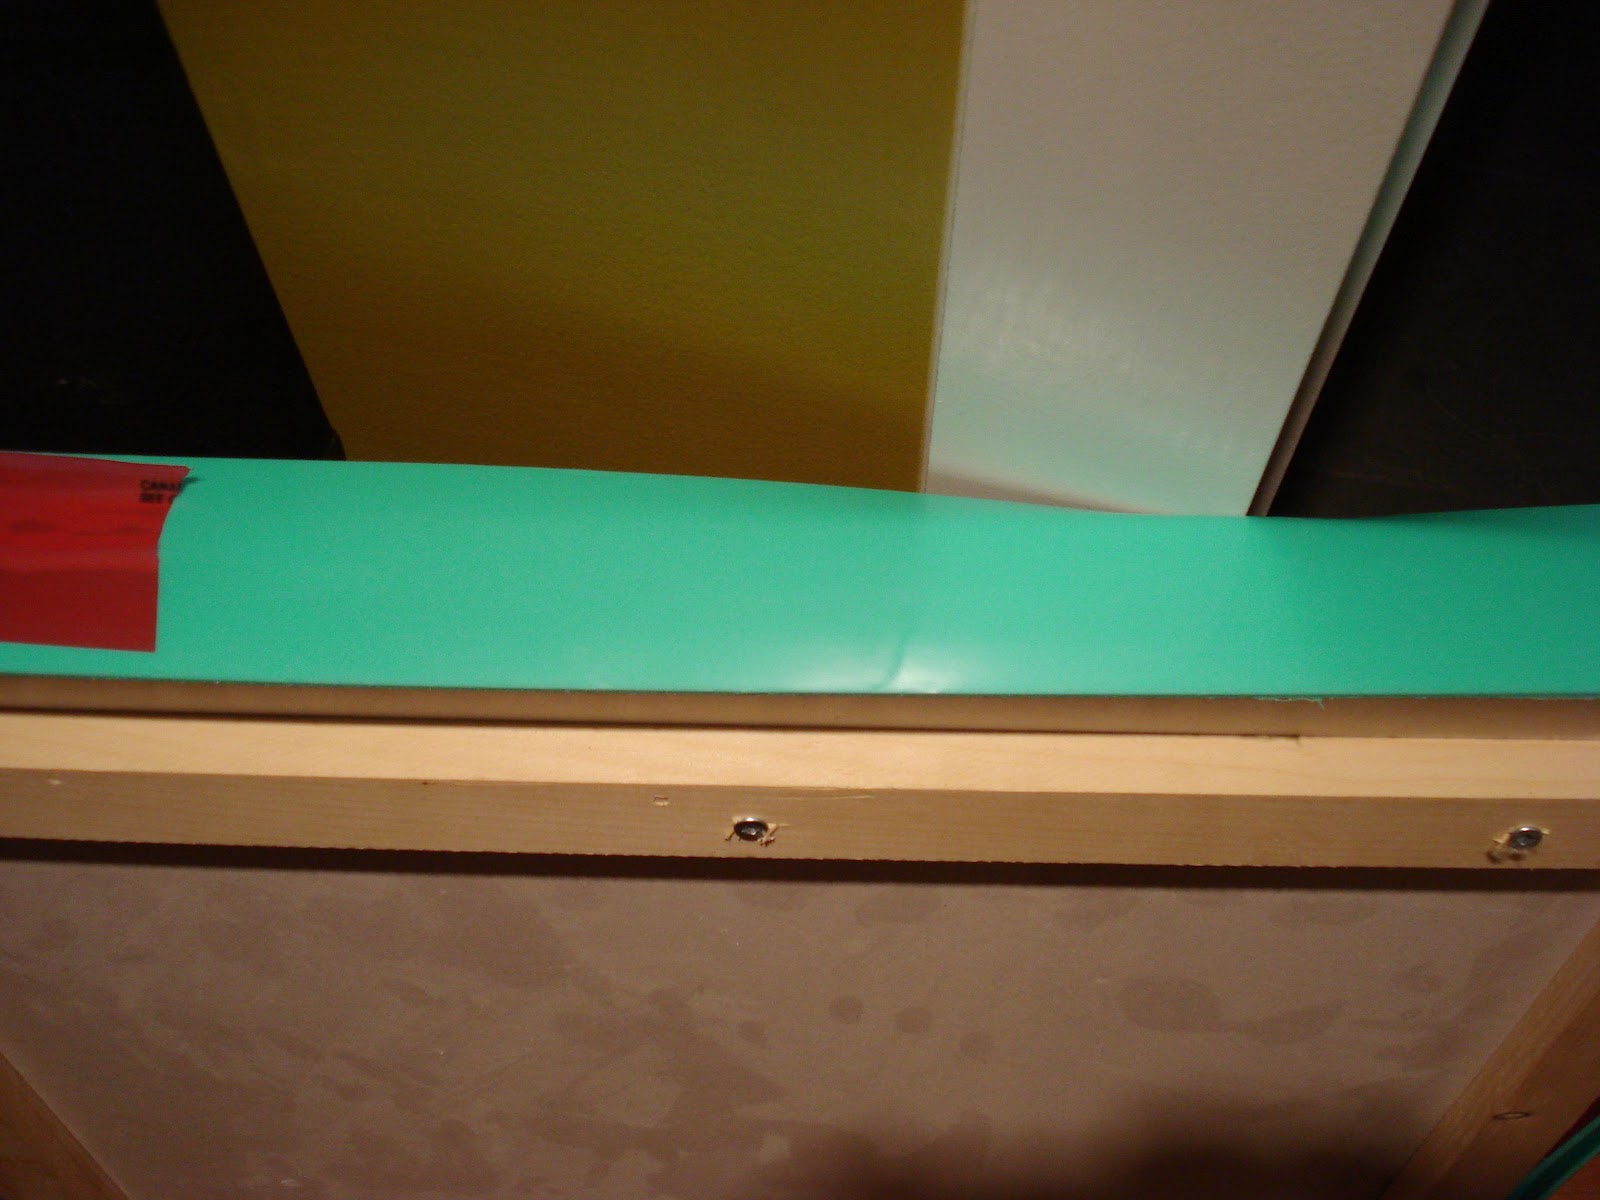
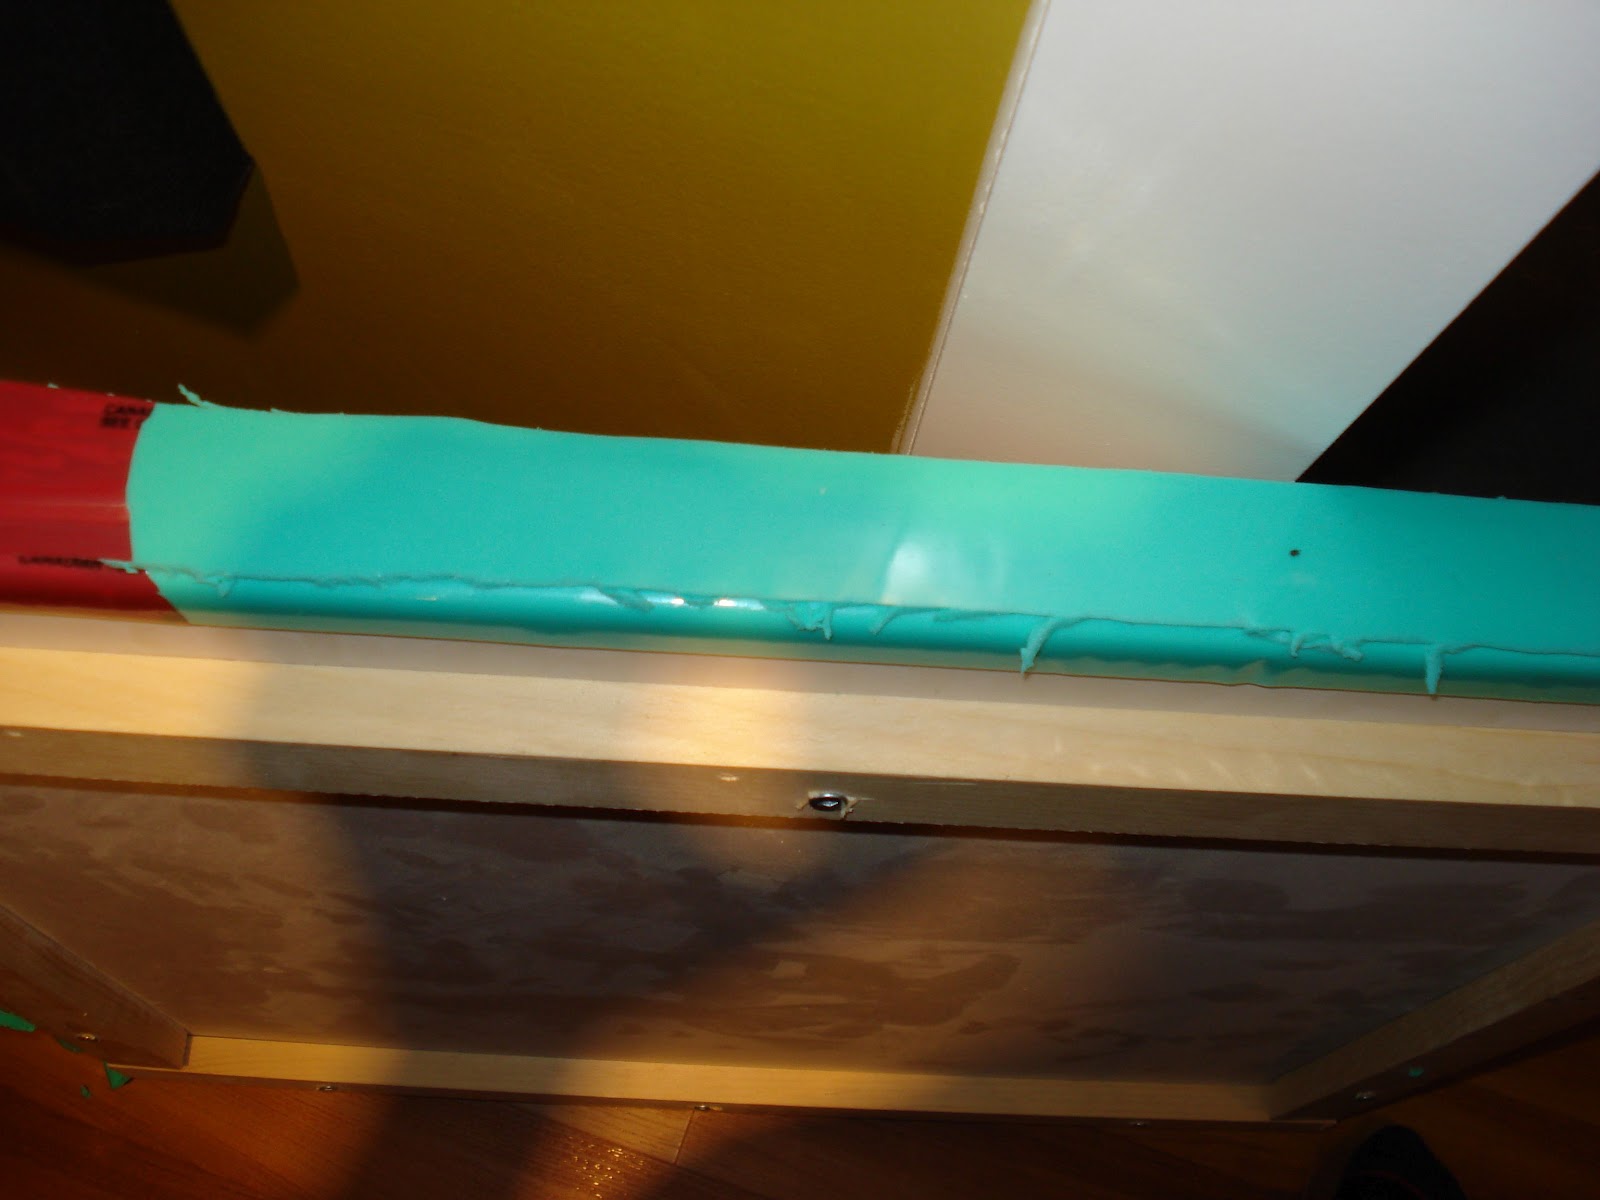
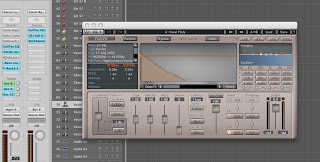
This set up works great and allows me to have my buffer size up quite high while still giving performers low latency while recording.  A problem arises though when someone wants reverb in the cans.  Years ago I figured out a little trick.  If you click on the "sends" rectangle that says what bus your send is going to some options will come up.  Here's a picture:


By default a send is "post fader" meaning the volume of the fader effects the volume going to the bus you're sending the signal to.  If you select "pre fader" the signal going to the bus won't be effected at all by the channel's volume fader.  What you do next is turn the volume of that fader all the way down so you don't get any of logic's latency signal in your headphones.  You're still going to have some latency with the reverb or delay but it's never an issue.  You can just consider it some extra pre-delay. :)

When the send is set up to be "pre fader" you'll notice it turns green as opposed to blue:


I should mention that when I do this I always set up a separate "record track" and slide the vocal onto another track for playback.  There's too many variables to adjust if you don't do it that way.


Catch me on the sites:


Monday, February 6, 2012

Soundproofing Windows with Homemade Plugs

Window's are always going to be a real weak spot when trying to soundproof a room.  While we did a lot to soundproof the new space (blog on that here) and it's working out great, I really wanted to make sure that the loud guitar amps and drums bleed out to the outside as little as possible.

To that end I decided to make some window plugs out of some of the left overs from the reno.  I took some drywall pieces and sandwiched a bottle of green glue in-between them and then I screwed some wood on either side to fasten the pieces better.  To create an airtight seal I got some Green Glue Company floor joist tape and I wrapped it around the plug a few times. The tape stuck great to the drywall but not to itself so I shaved off any excess and used tuck tape to make sure it was held nicely in place.


First we gotta apply some green glue soundproofing compound to a cut of drywall:

I put the two pieces of drywall together and screwed them between some wood so they would stay together better.  After that I wrapped around some Green Glue company joist tape so there's a soft, flexible material around the sides.  This makes a better seal and helps prevent damage to the window well.

I cut the excess joist tape off the sides of the window plug and then fasten it better with Tuct tape.


So now what I have is a pretty ugly window plug, haha.  I bought some speaker carpet and carpet glue to fix that.


Last step is adding some handles so it's easier to get it in or out.


If you read the soundproofing blog you'll know that this window is pretty hardcore but no soundproofing is perfect and in certain instances I want even more soundproofing.  If you're interested in window boxes with multiple panes of glass check out the soundproofing blog


Presto...


The thing that is really great about this is that you could soundproof a window without causing any damage to the window or well.  This is a great plus if you're renting or aren't in a position to do anything more permanent at your location.

***UPDATE***

I used an iphone db meter app (one of the ones which had a good review) and tested the sound with and without the window plug.  Here's the results:

Sound level in middle of room:              95db
Sound level outside by the window:      56db
Sound level outside window /w plug:    47db

It should be noted that 47db was about the residual noise in the neighbourhood because that's the level I had outside without any music playing at all.  To give you an idea of a relative measurement a small car driving past gave me a reading of 69db.

Anecdotally the sound coming out of the house was noticeably quieter with the plug installed in the window.  If I get a chance I'll retest with a more professional db meter if the opportunity arises.


Catch me on the sites:


Primacoustic Voxguard Placement Solutions

I wanted to stop using a vocal booth for the new space I was creating because they sound a bit boxy and they get really hot and uncomfortable for the artist.  Part of the plan to get rid of any reflections from the room in the vocal mic was getting some form of reflection filter.  I decided to get the Primacoustic Voxguard because it wasn't quite as bulky as the SE Reflection Filter.

Even though it's not as bulky I was having a real hard time trying to have it placed in a practical way.  It's designed to be on the same mic stand as the microphone but if I wanted to use the mic for another usage (recording acoustic guitar) I lost a lot of flexibility.

After trying a few different ideas I finally found something that works great.  I put the Voxguard on a different mic stand and placed it UNDER the microphone and placed the microphone upside down.  This works really well with a Neuman u87 because the shock mount that is made for it screws into the mic so there's not a lot of risk of it falling out.  If you're using a different mic with a mount that holds the mic with friction you'll probably want to take some other steps to make sure the mic can't fall out of the mount and break.

Here's some pics:


The u87 is screwed into it's mount so it's fairly secure but it doesn't hurt to wind the cord around the stand a few times for extra insurance!


This set up allows me the use of the Voxguard when needed and the flexibility of moving it out of the way easily when I don't.


Get More useful info from me at the following sites:


Catch me on the sites: